How do I wire trailer lights and brakes when towing?
Date Posted:5 March 2024
Introduction: Understanding Trailer Lights and Brakes
Correctly wired trailer lights and brakes are essential for safety and legality when towing a trailer. These lights ensure that other drivers can see your vehicle's movements, especially when turning or braking. Similarly, adequately wired trailer brakes allow for efficient braking and control, preventing accidents and damage.
The Importance of Properly Wired Trailer Lights and Brakes
-
Functioning trailer lights are crucial for road safety. They enable other drivers to anticipate your actions, reducing the risk of collisions.
-
Properly wired trailer brakes provide better control over your towing vehicle and trailer, allowing for smoother stops and improved handling.
Not only are functioning trailer lights and brakes crucial for road safety but they are also required by law. Various regulations dictate the specific requirements for trailer lighting and braking systems. By adhering to these legal requirements, you can avoid potential fines and ensure compliance with road safety standards.
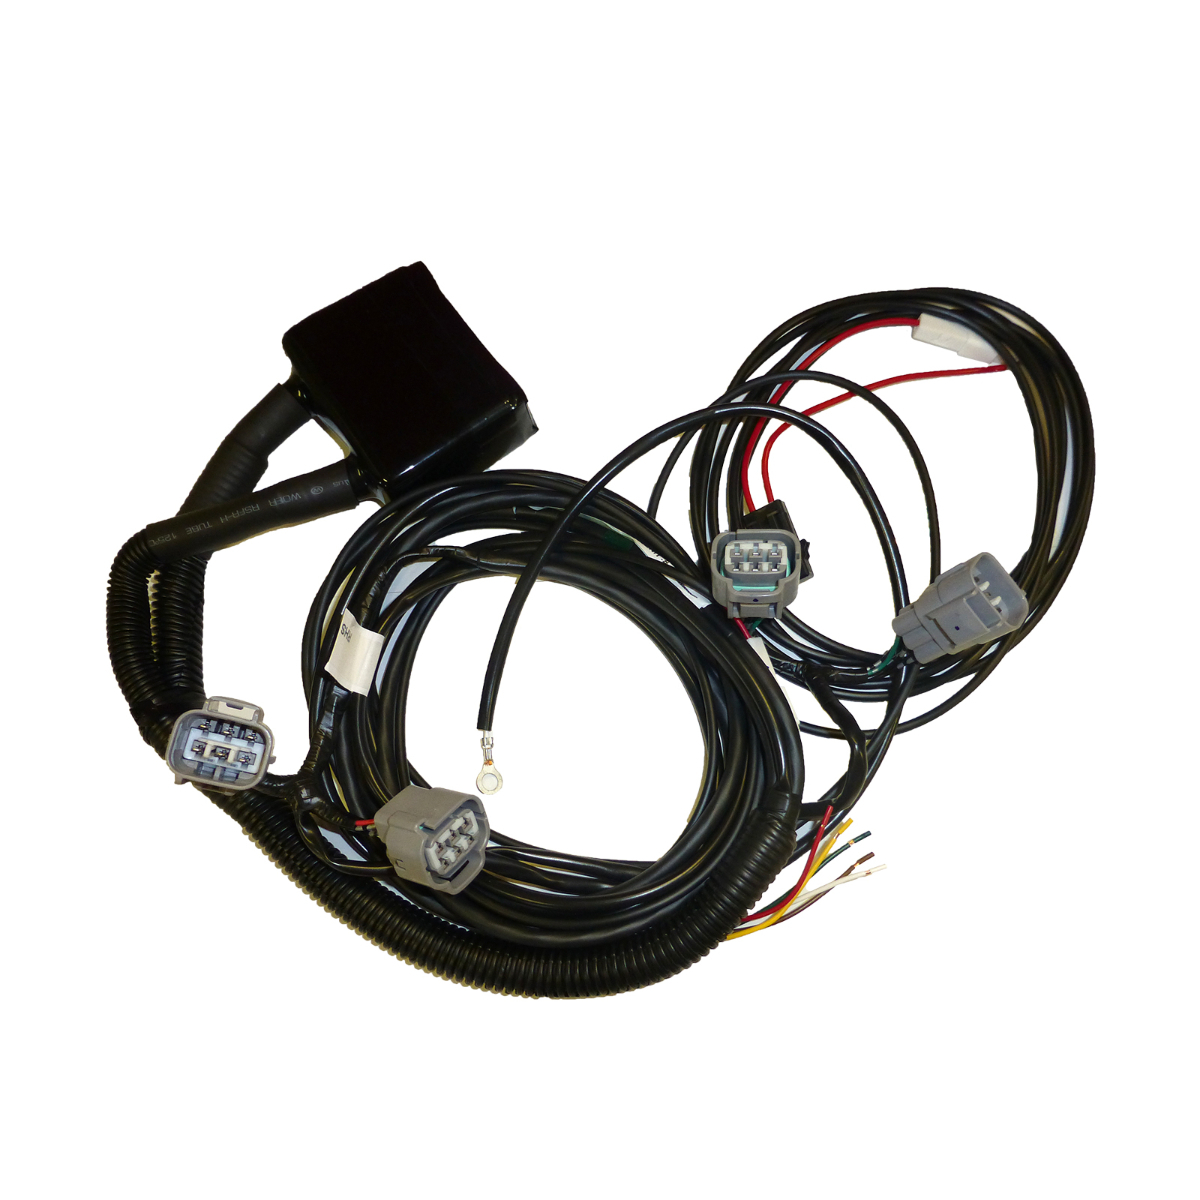
Introducing the Concept of a Trailer Wiring Kit and Its Benefits
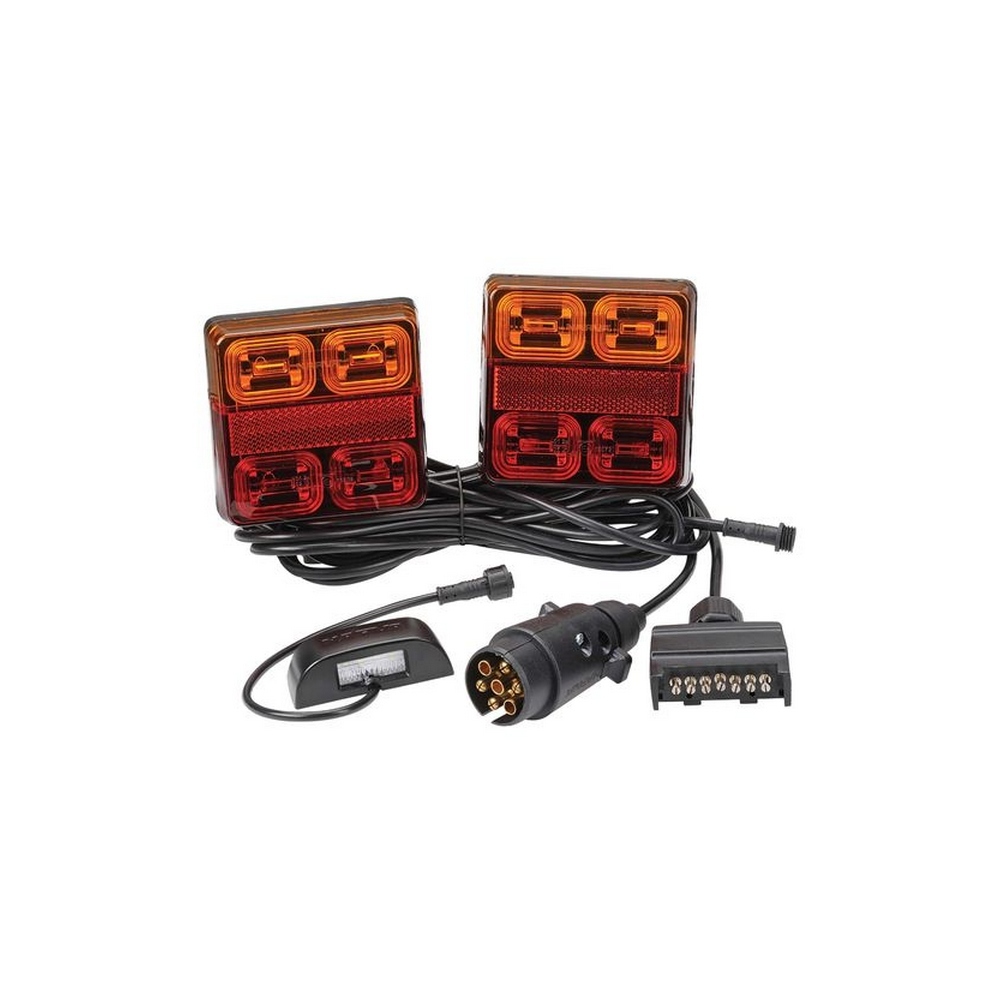
A trailer wiring kit can simplify the process of wiring trailer lights and brakes. A trailer wiring kit is a comprehensive package that includes all the necessary components, connectors, and instructions to properly wire your trailer's lighting and braking systems.
The benefits of using a trailer wiring kit are manifold:
-
Simplicity: A trailer wiring kit eliminates the need to source individual components separately, ensuring you have everything in one package.
-
Compatibility: These kits are designed to work with various trailer models and electrical systems, ensuring a seamless and hassle-free installation process.
-
Reliability: Trailer wiring kits often include high-quality components built to withstand the rigours of towing, ensuring a durable and long-lasting wiring system.
Now that we understand the importance of adequately wired trailer lights and brakes let's delve into the details of choosing the right trailer wiring kit to meet your specific needs.
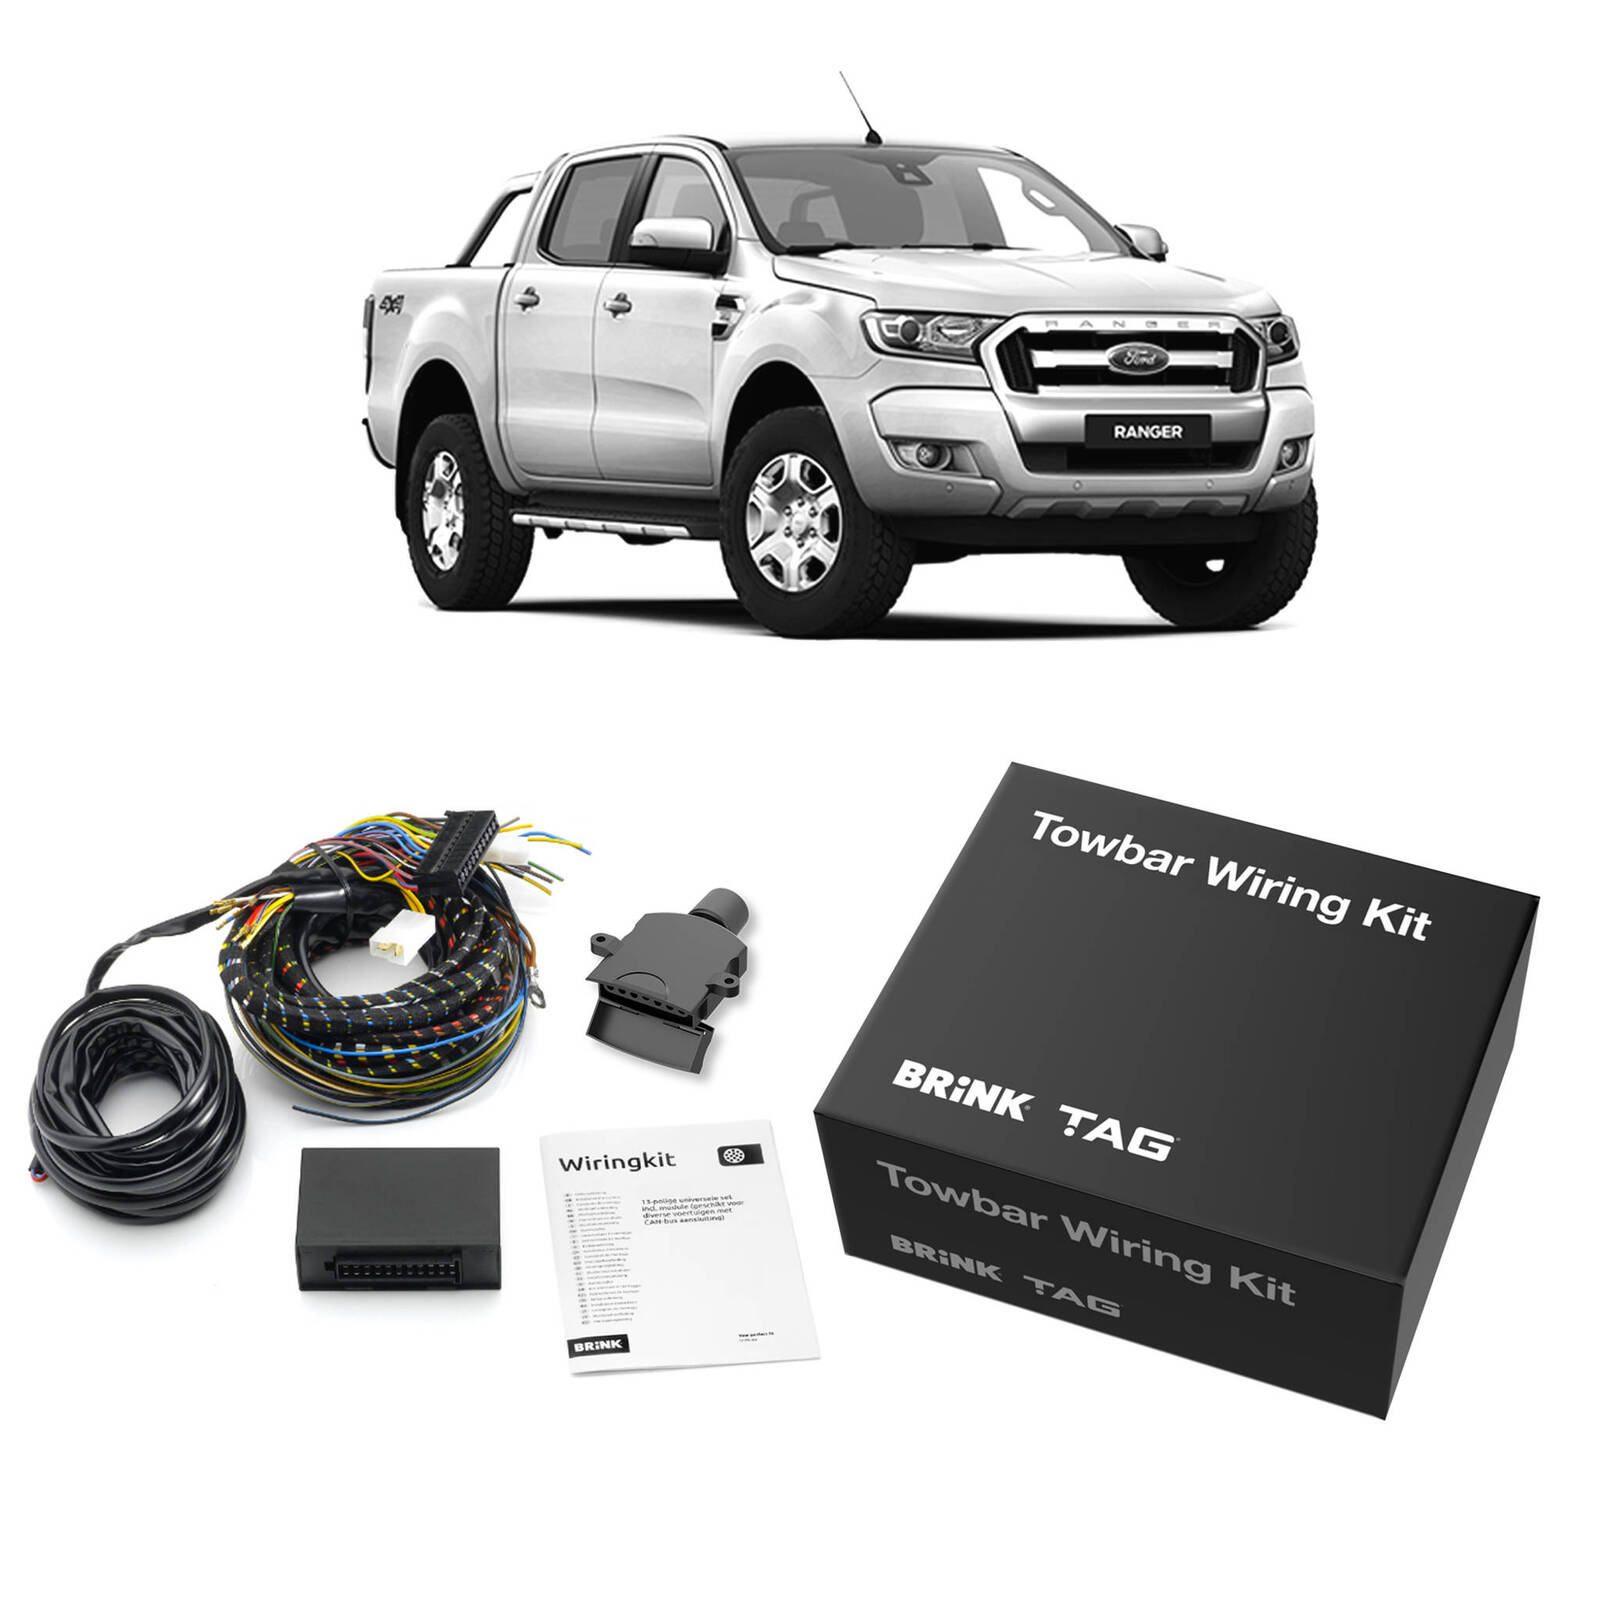
Choosing the Right Trailer Wiring Kit
When it comes to wiring trailer lights and brakes, choosing the right trailer wiring kit is essential. Various types of trailer wiring kits are available in the market, each with its own features and benefits. Understanding the different options and factors will help you make an informed decision.
Understanding Different Types of Trailer Wiring Kits
Before selecting a trailer wiring kit, it's essential to familiarise yourself with the different types available:
-
Universal Wiring Kits: These kits are designed to fit various trailer models and come with standard connectors and wires. They offer versatility and are suitable for most trailers.
-
Custom Wiring Kits: Custom wiring kits are tailored to specific trailer models and seamlessly integrate with the trailer's electrical system. They often include plug-and-play connectors for easy installation.
Both universal and custom wiring kits have their advantages. Universal kits are readily available and can be used for multiple trailers, while custom kits provide a more tailored solution for specific trailer models.
Another option to consider is using a pre-wired trailer harness. This type of kit comes with a complete wiring harness already assembled and ready to install, saving time and ensuring a hassle-free wiring process.
Factors to Consider When Selecting a Trailer Wiring Kit
To choose the right trailer wiring kit, it's essential to consider several factors:
-
Trailer Size: The size of your trailer will determine the length of wire needed for proper installation. Ensure that the wiring kit you choose suits your trailer's size.
-
Trailer Weight: Consider the weight of your trailer as it affects the electrical load. Make sure the wiring kit can handle the required voltage and current.
-
Electrical System Compatibility: Check if the wiring kit matches your vehicle's electrical system. Some vehicles may require specific wiring harnesses or adapters for proper connection.
Selecting a trailer wiring kit that meets legal requirements and vehicle specifications is crucial. This ensures compliance with safety standards and helps prevent any electrical issues while towing.
When choosing a specific brand or model of trailer wiring kit, it's helpful to consider customer reviews and expert opinions. Researching reputable brands known for their quality and reliability can help you make an informed decision.
Tools and Materials Needed for Wiring Trailer Lights and Brakes
Having the right tools and materials is essential when wiring trailer lights and brakes. Here are the key items you'll need to get the job done:
Essential Tools for Wiring Trailer Lights and Brakes
-
Wire cutters: These are used to cut and trim the trailer wires to the desired length.
-
Wire strippers: This tool is necessary for removing the insulation from the wires, allowing for proper connections.
-
Crimping tool: A crimping tool is used to attach connectors to the trailer wires securely.
-
Electrical tape: This is used to insulate and protect wire connections from moisture and damage.
Each of these tools plays a vital role in the wiring process. Wire cutters ensure precise wire lengths, while wire strippers make it easy to remove insulation without damaging the wires. The crimping tool is essential for creating secure connections, and electrical tape provides an extra layer of protection.
In addition to these basic tools, specialised tools may be required based on your specific trailer model or wiring kit. It's important to consult the instructions provided with your trailer wiring kit to determine if any additional tools are needed.
Materials Required for Wiring Trailer Lights and Brakes
-
Trailer wire: This is the main component that connects all trailer lights and brakes.
-
Connectors: Connectors join the trailer wire to the vehicle's wiring system and the individual lights and brakes on the trailer.
-
Heat shrink tubing: Heat shrink tubing provides added protection for wire connections, helping to prevent moisture and corrosion.
-
Mounting hardware: Mounting hardware is necessary to secure the trailer lights and brakes in place.
Each of these materials plays a crucial role in the wiring process. The trailer wire is the backbone, connecting all the lights and brakes to the vehicle's electrical system. Connectors ensure proper connections between the wires, lights, and brakes. Heat shrink tubing provides additional protection, and mounting hardware keeps everything securely in place.
When wiring trailer lights and brakes, it's important to choose high-quality components. This ensures durability and reliable performance, even in harsh conditions. Look for materials built to withstand moisture, vibration, and temperature fluctuations.
In addition to the essential materials listed above, additional items may enhance the durability or functionality of your wiring system. These could include a wire loom for added wire protection, cable ties for organising and securing wires, or even a multimeter for testing electrical connections.
With the right tools and materials, you'll be well-equipped to tackle the task of wiring trailer lights and brakes with confidence.
Step-by-Step Guide: Wiring Trailer Lights and Brakes
Understanding the Trailer's Electrical System
Before you start wiring your trailer lights and brakes, it's essential to understand the basic components of a trailer's electrical system. This knowledge will help you navigate the wiring process confidently.
-
Battery: The battery powers the trailer's electrical system, providing energy for the lights and brakes.
-
Ground: The ground connection ensures electrical current flows smoothly throughout the system.
-
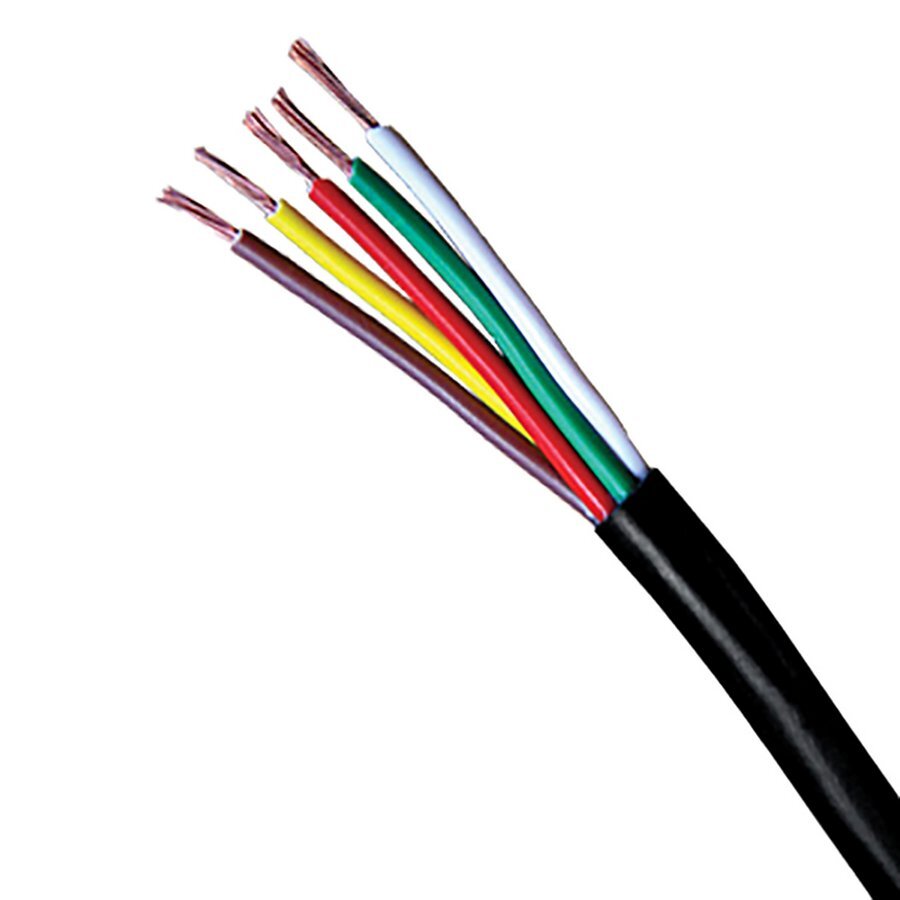
Wiring harness: The harness is a bundle of wires connecting various components of the trailer's electrical system.
To better visualise the wiring layout of your specific trailer model, it's helpful to refer to a diagram or visual aid provided by the manufacturer. This will give you a clear understanding of how each component is interconnected.
During the wiring process, you may encounter some common challenges. For example, if your trailer lights flicker or don't work, it could indicate a loose or faulty connection. In such cases, carefully check the wiring connections and ensure they are secure and properly attached. Additionally, troubleshoot any other potential issues related to the electrical system before proceeding.

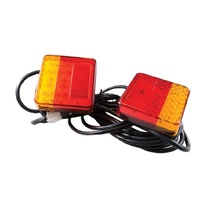
Wiring Trailer Lights
Now that you understand the trailer's electrical system well, it's time to connect the trailer lights to the wiring harness. Follow these step-by-step instructions:
-
Identify the appropriate wires on both the trailer lights and the wiring harness. Typically, color-coded wires correspond to specific functions such as brake lights, turn signals, and running lights.
-
Using wire cutters, carefully strip the insulation from the ends of the wires.
-
Match the corresponding wires from the lights and wiring harness based on their functions.
-
Twist the exposed ends of the matching wires together, ensuring a secure connection.
-
Once the connections are secure, cover them with electrical tape to protect against moisture and prevent accidental short circuits.
-
Properly route the wires along the trailer frame, securing them with cable ties or clips as necessary. Ensure that there is no excessive slack or tension in the wiring.
-
Test the lights after wiring to verify that they are functioning correctly. Activate each function, such as brake lights and turn signals, and observe if they work as intended.
By following these steps, you'll ensure that your trailer lights are properly wired and ready for safe operation on the road.
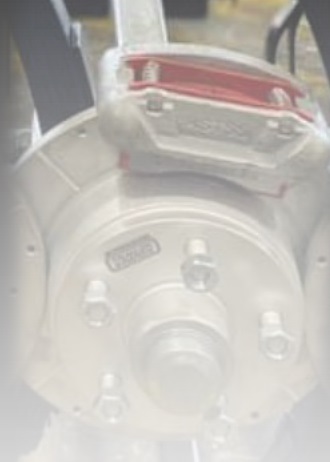
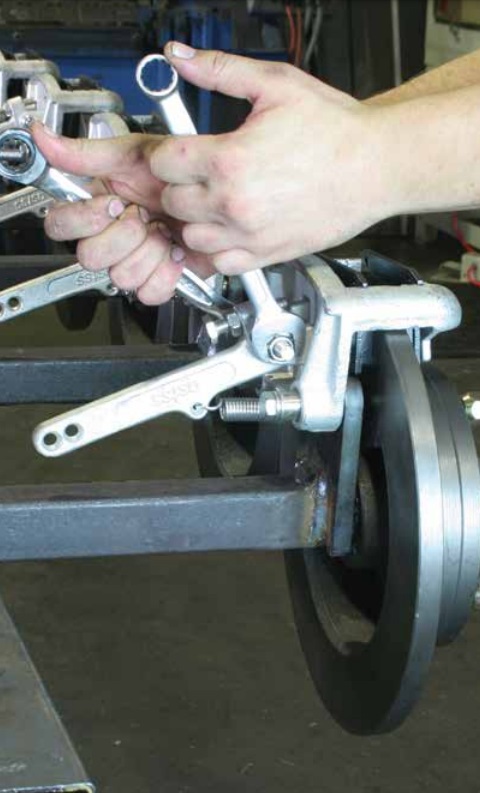
Wiring Trailer Brakes
If your trailer is equipped with brakes, it's crucial to understand the different types of trailer brakes and their specific wiring requirements. Here's a brief overview:
-
Electric brakes: Electric brakes require a separate brake controller installed in the towing vehicle. When applying pressure to the vehicle's brake, the controller sends electric signals to activate the trailer's brake pedal.
-
Hydraulic brakes: Hydraulic brakes, also known as surge brakes, use hydraulic pressure generated by the tow vehicle's deceleration to activate the trailer brakes. They do not require any electrical wiring.
To wire electric brakes, follow these steps:
-
Follow the manufacturer's instructions to install a brake controller in your towing vehicle.
-
Connect the wiring harness of the brake controller to the vehicle's electrical system.
-
Refer to the wiring diagram the brake controller manufacturer provided to identify the correct wires for connecting to the trailer's brake system.
-
Connect the corresponding wires from the brake controller to the trailer's brake system, ensuring secure connections.
-
Adjust the brake controller settings according to the manufacturer's recommendations for optimal braking performance.
If you encounter any issues with your trailer brakes, such as uneven braking or loss of braking power, it's essential to troubleshoot and resolve them promptly. Check for loose or damaged wiring connections, inspect the brake components for wear or damage, and adjust the brake controller settings if necessary. Regular maintenance and inspection will help ensure your trailer brakes' reliable performance.
Tips for Troubleshooting and Maintenance
Common Issues with Trailer Lights
-
Identify common problems such as flickering lights, dimming lights, or lights not working at all.
-
Provide step-by-step troubleshooting instructions for each issue and suggest possible solutions.
-
Offer maintenance tips to prevent future problems and ensure long-lasting performance.
Troubleshooting Trailer Brake Problems
-
Discuss common issues like uneven braking, loss of braking power, or brake lock-up.
-
Provide troubleshooting steps to diagnose and resolve these problems.
-
Regular maintenance practices are recommended to keep the trailer brakes in optimal condition.
Regular Inspection and Maintenance Schedule
-
Explain the importance of regular inspection and maintenance to prevent potential wiring or brake failures.
-
Provide a checklist of items to inspect and maintain monthly, quarterly, and yearly.
-
Offer tips for storing the trailer during off-seasons to minimise wear and tear on the wiring system.
Properly functioning trailer lights and brakes are crucial for safe and hassle-free towing experiences. However, issues can arise over time due to various factors. By understanding common problems and having the knowledge to troubleshoot and maintain your trailer's lights and brakes, you can ensure a smoother journey.
Common Issues with Trailer Lights:
Flickering lights, dimming lights, or lights not working are some of the most common problems with trailer lights. To address these issues:
-
Check the connections: Ensure all wiring connections are secure and corrosion-free. Tighten any loose connections or replace damaged wires.
-
Inspect the bulbs: Remove the light housing and examine the bulbs for any signs of damage or burnout. Replace faulty bulbs with new ones of the correct type and wattage.
-
Test the ground connection: A poor ground connection can cause lighting issues. Clean the ground connection point and ensure it is solidly connected to the trailer frame.
-
Consider upgrading to LED lights: LED trailer lights are more durable, energy-efficient, and provide brighter illumination than traditional incandescent lights. Consider replacing your existing lights with LED alternatives for improved performance.
Troubleshooting Trailer Brake Problems:
Brake-related issues can compromise your trailer's stopping power and pose a safety risk. Here are some steps to troubleshoot common brake problems:
-
Check brake fluid levels: Insufficient brake fluid can cause uneven braking or a loss of braking power. Ensure the fluid reservoir is filled to the recommended level.
-
Inspect brake pads and rotors: Worn-out brake pads or damaged rotors can lead to subpar braking performance. Replace worn or damaged components as needed.
-
Adjust brake controller settings: Improperly adjusted brake controllers can cause brake lock-up or inadequate braking force. Consult your trailer's manual for instructions on adjusting the controller settings.
-
Maintain proper brake system lubrication: Regularly lubricate moving parts of the brake system to prevent excessive friction and ensure smooth operation.
Regular Inspection and Maintenance Schedule:
Preventive maintenance is critical to avoiding potential wiring or brake failures. Follow this checklist to keep your trailer in optimal condition:
-
Monthly inspections:
-
Check all lights and replace any faulty bulbs.
-
Inspect wiring connections for signs of wear or corrosion.
-
Ensure the brake fluid reservoir is at the proper level.
-
-
Quarterly inspections:
-
Inspect brake pads and rotors for wear and damage.
-
Test the brake controller to ensure proper functioning.
-
Check the ground connection for any signs of looseness or corrosion.
-
-
Yearly inspections:
-
Perform a thorough check of the entire wiring system, looking for any frayed wires or damaged components.
-
Clean and lubricate the brake system as recommended by the manufacturer.
-
Inspect the trailer frame for any signs of rust or structural issues.
-
Additionally, when storing your trailer during off-seasons, take precautions to minimise wear and tear on the wiring system. Store the trailer in a dry and secure location, protecting it from harsh weather conditions. Cover the trailer to prevent dust and debris from accumulating on the lights and brakes.
By addressing common issues, performing regular maintenance, and following a comprehensive inspection schedule, you can ensure that your trailer's lights and brakes remain in optimal condition, providing safe and reliable towing experiences.
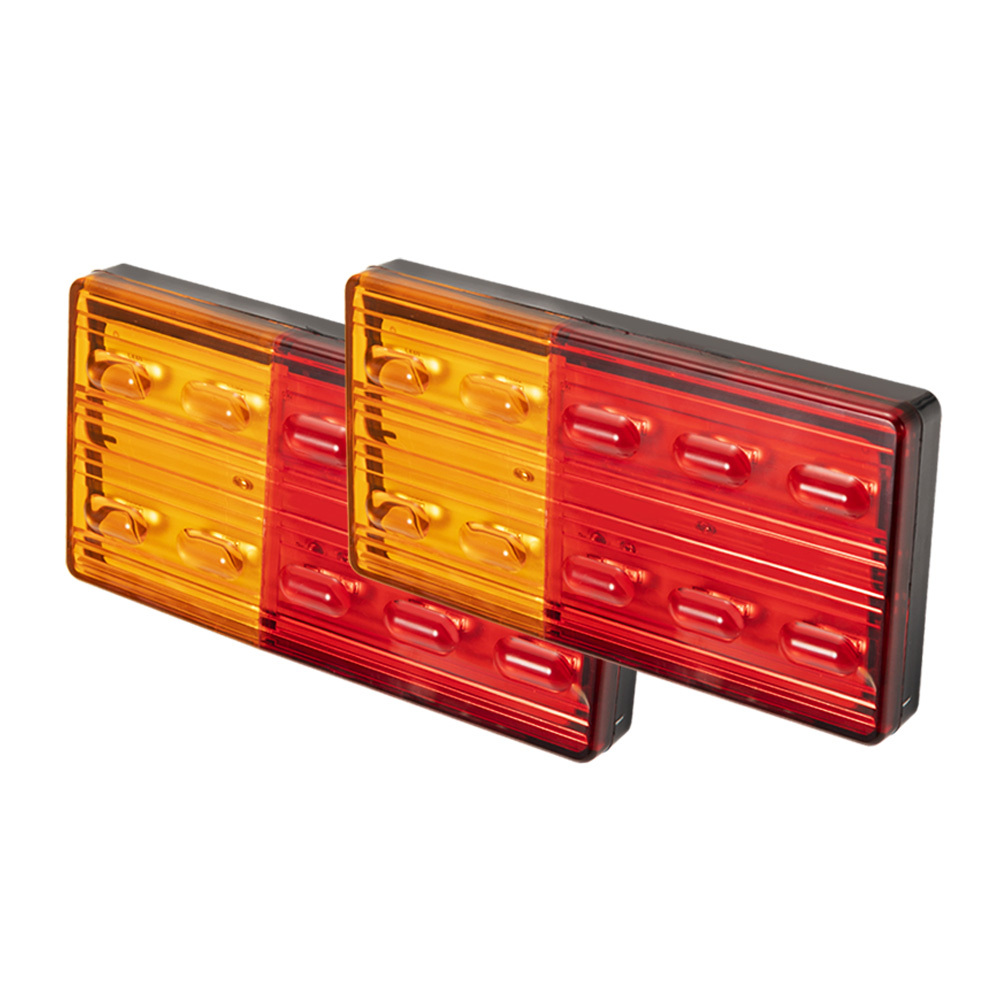
Advantages of LED Trailer Lights
Introduction to LED Trailer Lights
LED lights offer numerous advantages over traditional incandescent lights for trailer lighting. Understanding these benefits can help you decide when to wire your trailer lights.
-
Energy Efficiency: LED lights are highly energy-efficient compared to incandescent lights. They require significantly less power to operate, which saves money on fuel costs and reduces strain on your vehicle's electrical system.
-
Durability: LED lights are built to withstand harsh road conditions and are more durable than incandescent lights. They resist vibrations, shocks, and extreme temperatures, making them ideal for trailers that often encounter rough terrains.
-
Brighter Illumination: LED lights produce a brighter and more focused light output, improving visibility for you and other drivers on the road. This enhanced illumination increases safety, especially during nighttime driving or adverse weather conditions.
In summary, LED trailer lights offer energy efficiency, durability, and brighter illumination than traditional incandescent lights. These advantages make them a popular choice among trailer owners looking to enhance safety and reliability on the road.
Converting to LED Trailer Lights
If you're considering upgrading to LED trailer lights, it's essential to understand the conversion process and any necessary modifications or wiring changes that may be required.
-
Replacing Existing Lights: To convert to LED trailer lights, replace your current incandescent lights with LED equivalents. This typically involves removing screws or bolts that secure the old lights and disconnecting the wiring harness.
-
Modifications and Wiring Changes: Depending on the specific LED lights you choose, you may need to modify or change the wiring to ensure compatibility. Follow the manufacturer's instructions carefully and consult a professional if necessary.
-
High-Quality LED Brands: Investing in high-quality LED trailer lights is important to ensure optimal performance and longevity. Look for reputable brands with positive customer reviews and a track record of producing reliable products.
Converting to LED trailer lights offers numerous benefits, but it is crucial to follow the proper installation procedures and select high-quality products. By doing so, you can enjoy the advantages of LED lighting while ensuring safe and reliable trailer lighting.
Conclusion: Ensuring Safe and Reliable Trailer Lighting
Throughout this blog post, we have discussed the importance of properly wired trailer lights and brakes for safe and secure towing. By understanding the basics of trailer wiring, choosing the right wiring kit, and following a step-by-step guide, you can ensure that your trailer's lights and brakes function optimally.
Having functioning trailer lights and brakes is convenient and a legal requirement when you hit the road with a trailer. Properly wiring your lights prioritises safety and allows other motorists to see your trailer clearly, especially at night or in adverse weather conditions.
Investing in a trailer wiring kit can simplify the process of wiring your trailer lights and brakes. These kits come in various types, including universal and custom options. While universal kits offer versatility, custom kits are designed for certain vehicle models, ensuring seamless integration.
When choosing a specific brand or model of trailer wiring kit, it's helpful to consider customer reviews and expert opinions. Researching reputable brands known for their quality and reliability can help you make an informed decision.
Properly wired trailer lights and brakes require the right tools and materials. Wire cutters, wire strippers, a crimping tool, and electrical tape are essential tools for the wiring process. High-quality components such as trailer wire, connectors, heat shrink tubing, and mounting hardware ensure durability and reliable performance.
Understanding the trailer's electrical system is crucial before wiring your trailer lights and brakes. Familiarise yourself with the battery, ground connection, and wiring harness. This knowledge will help you navigate through the wiring process with confidence.
When wiring trailer lights, follow a step-by-step guide to ensure proper connections and routing of wires. Cover connections with electrical tape for protection against moisture and accidental short circuits. Test the lights after wiring to verify their correct functionality.
If your trailer is equipped with brakes, understand the different types of trailer brakes and their specific wiring requirements. Electric brakes require a separate brake controller installed in the towing vehicle, while hydraulic brakes do not require any electrical wiring.
Troubleshooting and regular maintenance are crucial for addressing common issues with trailer lights and brakes. Identify problems, provide step-by-step instructions, and offer maintenance tips to prevent future issues.
Following a regular inspection and maintenance schedule ensures that your trailer's lights and brakes remain in optimal condition. Regularly check all components, including lights, wiring connections, brake fluid levels, brake pads, rotors, and the ground connection.
Upgrading to LED trailer lights offers energy efficiency, durability, and brighter illumination than traditional incandescent lights. Follow the conversion process by replacing existing lights with LED equivalents and making any necessary modifications or wiring changes.
In conclusion, by prioritising safe and reliable trailer lighting through proper wiring, regular maintenance, and considering LED options, you can enjoy hassle-free towing experiences while adhering to legal requirements and ensuring road safety.
Comments (1)
HOW DO I WIRE TRAILER LIGHTS AND BRAKES WHEN TOWIN
By: Salvato Resrandazzo on 19 April 2024Wiring trailer lights and brakes when towing involves connecting the trailer's electrical system to the vehicle's. Start by attaching the wiring harness to the trailer and vehicle, matching the color-coded wires. Ensure proper grounding and use waterproof connectors. Test the lights and brakes for functionality before hitting the road. Visit - https://srbequipment.ca/blog/what-are-the-main-parts-of-professional-trailer-repair-services/


